Here we are going to take a look at exactly how to set up your digital piano. This takes into account two different types of digital pianos: the home piano and the stage piano.

Home digital pianos are made for practising.
Home digital pianos have speakers on top or underneath the piano. This means you can hear it either with headphones (where the speaker is disabled), or out loud with volume control.
This is however not ideal for a live music performance or studio setting.
Home digital pianos can be purchased as piano-only and a separate stand used, or it can come with it’s own casing: attached legs, ‘modesty panel’ at the back and three attached pedals. These are heavier and not ideal for transporting to a gig or studio situation.
The stage digital piano is built for performance.

The stage piano often lacks onboard speakers so that the audio from the piano doesn’t interfere with the stage sound. If there are speakers on the piano they will 'bleed’ into any microphones that may be on stage for vocals or other instruments, so this is avoided by excluding them.
The lack of speakers onboard is great on stage or in the recording studio, particularly if you play and sing at the same time, but it's tricky for practising at home because without a PA system how will you broadcast the sound of the piano?
You can easily use headphones as a practising option but for listening aloud you need to have a small keyboard amplifier and a cable to join between.
Further reason to use stage pianos for gigging is aptly described by Wikipedia:
“Stage pianos often have a heavier, more robust body, which is better able to withstand the stress of heavy touring. Unlike digital pianos designed for home use, they do not have a fixed stand or fixed sustain pedals. Instead, they are designed to be used with a separate portable stand and portable, plug-in sustain pedals. This makes stage pianos easier to transport on tours.” - Wikipedia.
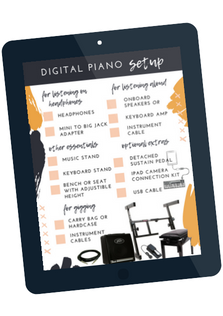
Want the easy 1-page version?
Enter your details to instantly receive the printable Digital Piano Setup Checklist!
Here are the parts to the standard digital piano:
Keyboard
Keyboard is where you connect with the piano. Your touch on the keys is what communicates how the sound of each note should be triggered electronically. The quality of the keyboard’s sensitivity to your touch can usually be changed in order to create a fuller or lesser range of dynamics. Soft playing (where the keyboard is extra sensitive to changes in your touch) or hard playing (where the keyboard is more forgiving of slight changes in the impact of your touch) can be selected.
Another way the keyboard responds to your touch is through the weight of the keys. Some digital pianos have semi-weighted or fully-weighted keys which make the likeness to playing an acoustic piano less or more realistic. This affects the range of dynamics you create and your technical capacity if you are more accustomed to weighted or acoustic piano keys.
Circuit board
The circuit board is where the translation happens from the signals you send through the keys, to initiating the programmed sounds. This is the most valuable part of the piano and why it is imperative to keep the piano in a room that is neither too damp, nor too cold, as this can damage the electronics.
Pedals
Home digital pianos (those attached to a frame) have three pedals: the soft pedal, the sostenuto pedal and the sustain pedal. The left ‘soft’ pedal (or ‘una corda’) creates a softer volume on the notes you play. The middle ‘sostenuto’ pedal is often used to practice very quietly and can sometimes be slid to a fixed down position (to the left) for near silent playing. The right ‘sustain’ pedal (or ‘damper’ pedal) will sustain the notes you play for longer allowing the pianist to play smooth legato passages, it also creates a richer tone known as the ‘sympathetic string’.
Function buttons

Different function buttons will depend on the model of the piano. Some usual functions include:
Additional sounds: change different voices by pressing the ‘shift’ button and a key at the same time or simply pressing the button labelled with the desired sound. Some digital pianos have a scroll wheel to select sounds.
Key split: Assign one sound to the lower half of the keyboard and another sound to the upper half. You can choose the key at which this change in sound occurs.
Dual Mode/Layering: While the key split chooses two sounds for two ends of the piano, dual mode selects two sounds to be played simultaneously when any key is played. Some pianos allow you to adjust the volume of each sound individually.
Sequencer: Some digital pianos will have onboard recording. This can range from a simple 1-track recorder, to 4 or more tracks recorded separately to layer over one another or in succession. Some pianos will include a looping function to set the recorded tracks to repeat on loop.
USB/MIDI: This capability allows you to connect the electronic signal of your piano to your computer or device (with an attachment). You can either send or receive electronic information allowing you to export your playing to an external software, or import new sounds or tracks to be played through your piano (great for playing to backing tracks!).
Transposition: Many digital pianos will have transposing buttons. These allow you to take the notes played through each key and either sharpen or flatten them. This can come in handy if, for instance, you can play a song in the key of C, but the rest of the band or your backing track wants to play it in Bb. Use the transposing button to flatten the notes by two half-tones to play in the same keys you know but sound like you’re in the new key! You’ll avoid having to transpose the music to a different key in your head and learn the different notes.
This is what you’ll need for listening on headphones.
Headphones or earbuds
Mini-to-big jack adapter.
This is what you’ll need for listening aloud.
For stage pianos without speakers, or for amplifying your sound for performance.
A keyboard amp (not a guitar amp, but you can use a bass guitar amp instead if a keyboard one is not available).
An instrument cable to go from the piano to the amp
Other essentials.

Music stand to put your music, notebook, chord sheets, folders, cellphone & pens on. Often these come standard with a home digital piano, but when buying the board on it’s own you may need to buy one of these separately. I have a free standing one (like on the right) so that I can adjust it and also use for my vocal students.
Keyboard stand. The X stand is the most common for standard digital pianos, however having recently switched to the Z stand option I prefer it - there’s much less banging my knees on the frame, so it’s generally better for sitting at. The 4-leg stand is a great option if you have a very heavy digital piano. Whatever style you go for, the quality of materials and assembly will determine what sort of weight it can hold, so always compare the capacity of each with your pianos weight.
While you are deciding on a stand to purchase you can simply put the piano on a table or desk surface, but be sure to put padding underneath to protect the surface and add breathable space for the electronics under the piano.
Adjustable bench. An adjustable height allows you to get the right posture for your body length and therefore have your arms and hands at the correct level at the piano. To start with you can use an adjustable office chair or a dining chair with stacked cushions.
Optional extras.

Detached sustain pedals. The option on the left is the standard in digital pianos. The type on the right is called a switchable sustain pedal and is mostly just for keyboards rather than digital pianos. The damper pedal on the left allows for varying degrees of sustain depending on how much you push the pedal down, while the switchable is an on or off mechanism.
iPad camera connection kit. This little ditty can help with plugging the USB port of your digital piano into an iPad or iPhone (the specific connection type, ie 30-pin or lightning, must be chosen to suit your device). This enables you to use a world of musical apps with your piano playing and is a whole lot of fun.
USB connection cable or MIDI cable. A USB cable is used to connect your digital piano to either the iPad camera connection kit above, or straight into your computer. This can be used to record your playing and manipulate it with software. A USB cable can send both audio and MIDI information*. The MIDI cable is used if you have a separate interface which receives a MIDI cable as input, the interface will then connect to a computer. This is less used these days since the USB connection can send MIDI information as well as audio, while the MIDI cable can only send MIDI information and not audio.
ONLY IF YOU PLAN ON DOING LIVE PERFORMANCES...
Gig bag or case, instrument cables, DI box. All of these things are good to have if you plan on taking your digital piano to gigs:
A gig bag or hard case makes it much easier to carry and also protects your piano in transit.
A DI box is usually provided by the sound technician at a venue, but sometimes it’s handy to have one, or two if you plan to go ‘stereo out’ with a left and right output instead of just mono (one) output. This creates a stereo pan of the left and right sides (high and low) of the piano rather than all coming from centre.
Multiple instrument cables. You never know when one is going to stop working or begin crackling so always carry a couple to connect your digital piano to the PA system. Many venues will have some extra cables but it’s best not to rely on these.

What's MIDI?
MIDI stands for Musical Instrument Digital Interface.
What’s “MIDI information”?
MIDI stands for Musical Instrument Digital Interface. It was invented in the 80s to connect electronic musical devices with one another & computers. Rather than creating a sound, MIDI is an ON/OFF signal telling a sound creating software or instrument which notes to sound, when and how. So rather than creating a sound, it creates information about the sound which can be sent to software and hardware.
Hardware that receives MIDI includes: another keyboard, synthesizer, or external sound module.
Software that receives MIDI includes: Ableton, Garageband, Logic etc.
The advantages of using MIDI are:
It takes up less storage space than audio recordings.
All the information can be manipulated: the notes can be changed to different pitches, different durations, different starting points & different volume without having to re-record.
It can be changed to a totally different instrument.
Watch this video to see how I setup my stage piano.

![Am I too old to start playing piano? [Student story]](https://images.squarespace-cdn.com/content/v1/598feec015d5db6d7e409176/1647402950192-R49L48S0PZILF5V9WO1M/_FB+LIVE+_thumb_impossible.png)


Looking for something specific? Try the search bar below.